

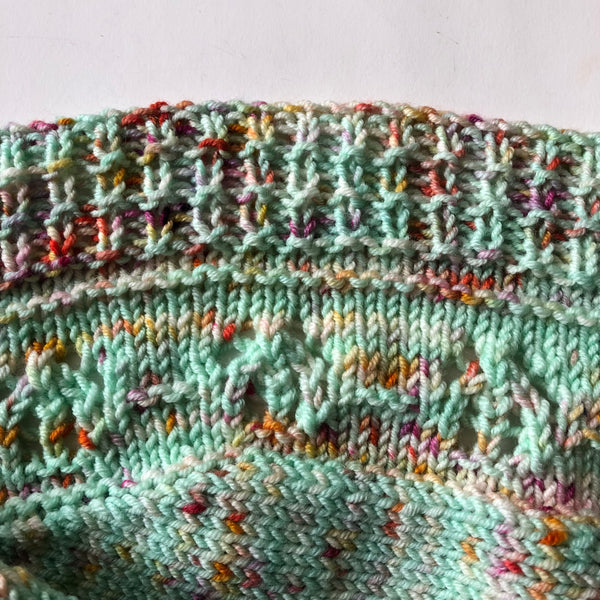
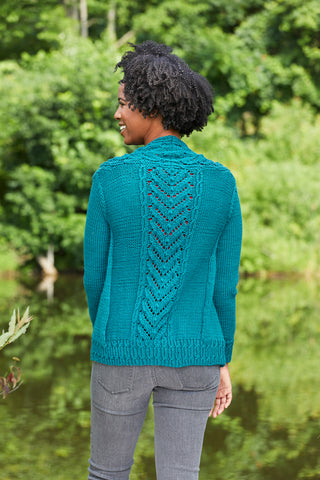
Have you ever completed a garment and realized that you actually needed a buttonhole in it? I have had this happen several times when I was knitting someone else's pattern and most recently when I was designing the Lotusland cardigan. I originally thought that the pattern would be best as an open front cardigan and then when I finished it and tried it on... I changed my mind!

But that textured lace and twisted rib edging which is so beautiful and makes the cardigan so special was not very rework friendly. And the thought of ripping it out and reknitting it just made me want to cry (designers are people too, we also hate fixing mistakes, re-knitting pieces and sometimes we even want to set our own ideas on fire... or maybe that's just me?).
So one morning when I couldn't possibly put it off any longer I grabbed some extra yarn, scissors, and the sample, sat down in my sunny studio space and prepared for some serious heavy lifting: how to cut apart the front band and use a needle to graft twisted ribbing together while creating a buttonhole. I started by pushing my index finger into the ribbing to see exactly where a buttonhole might work best, and you know what? it seemed like that merino superwash was elastic enough to just push aside and maybe slip a button into. Hmmmmm ... an idea was born... so I used a length of yarn and a tapestry needle to gently open a buttonhole by sewing around my chosen opening with whipstitch.
A note on fibers: this technique works really well with a flexible yarn like a wool, or wool blend. The less elastic the yarn is the less successful the buttonhole will be using this method. A general rule would be that if you can wiggle your finger into the work and pull the stitches apart into a large enough space for a button... then you can sew that opening into an afterthought buttonhole.
How to:
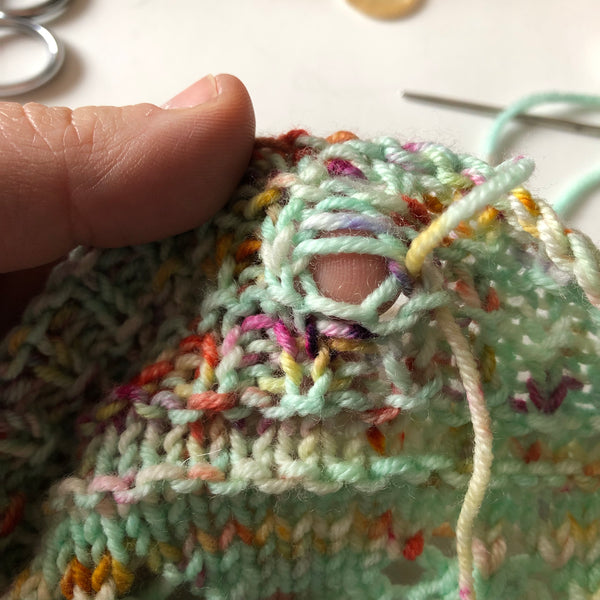
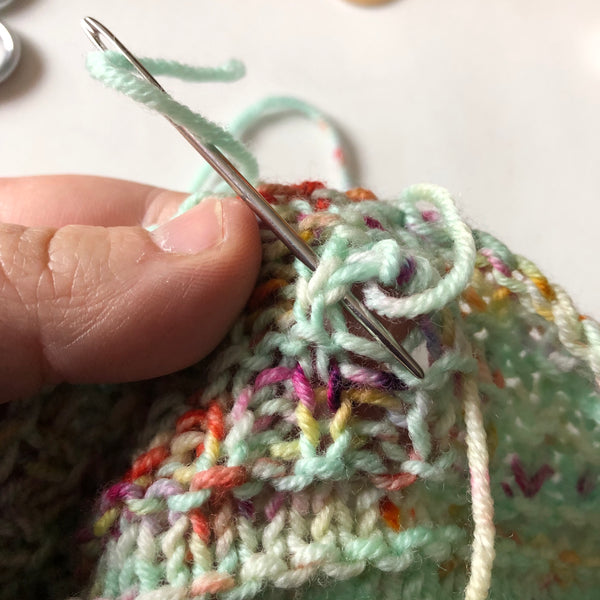
To start, poke your finger into the work in the area that you want the buttonhole to be. Try to have the new buttonhole be inside a stitch since it makes the nicest hole. Bring the needle threaded with matching yarn through the work to the right beside the intended buttonhole spot.
Insert the needle down into the work beside the hole and up out of the intended buttonhole keeping your finger in the hole for the time being. Now see those two stitch ladders above the hole (two horizontal lines) we are going to work the yarn around those a couple of times to open the hole up.
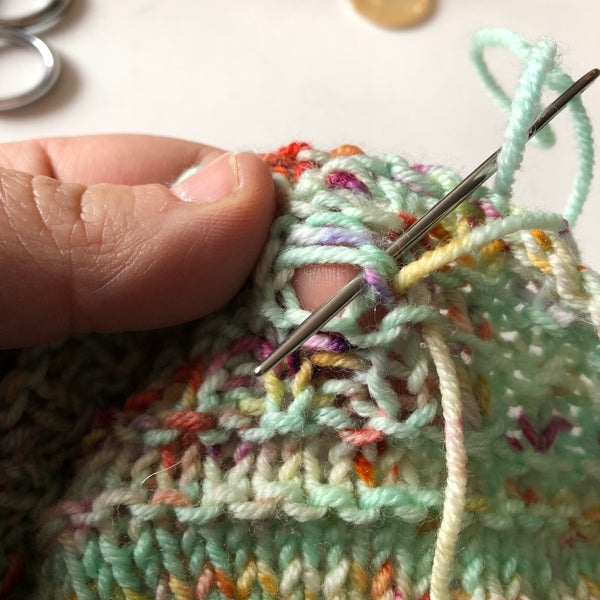
Bring the needle down over the top of those horizontal ladders and out towards you through the buttonhole 4 times. (4 wraps are what worked for my DK weight yarn and desired hole size, you may need more or less wraps according to the project you are working on).
Now continuing to insert the needle down into the work and bring it out through the hole stitch around the half of open stitch you are making the hole into and half of the next stitch on the left side of the hole.
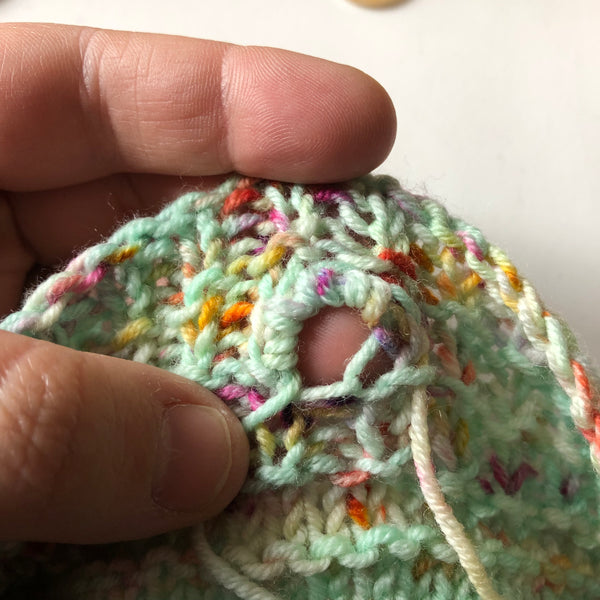
Do this a total of 4 times for4 wraps on the side, as you can see our buttonhole is emerging!
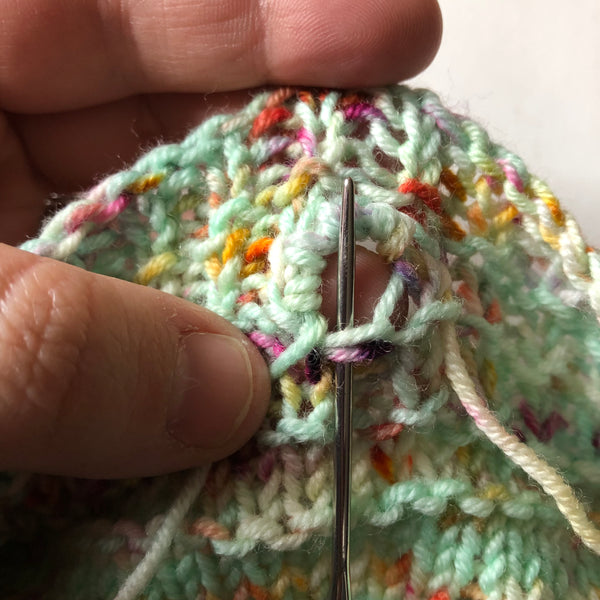
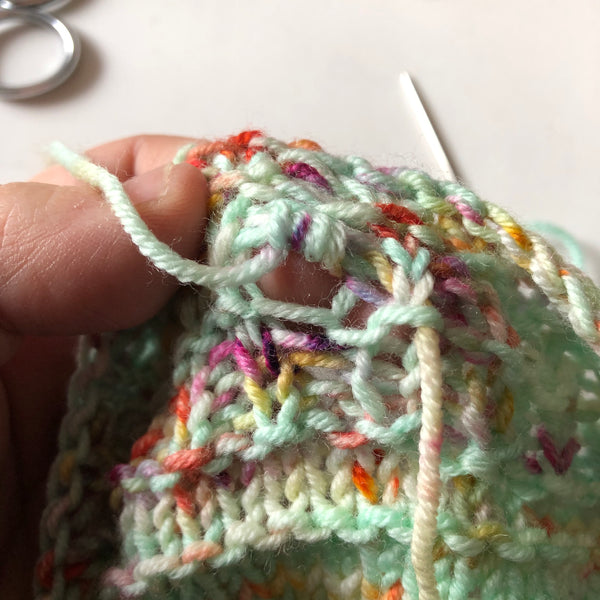
Now, work 4 wraps into the bottom 2 horizontal ladders.

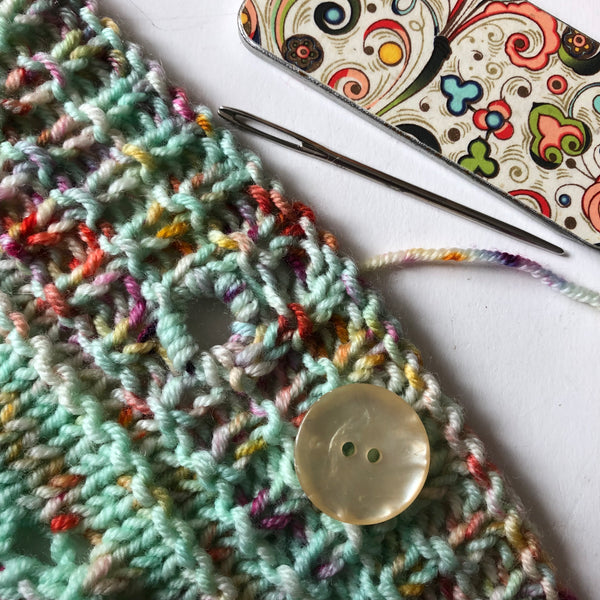
And finally work 4 wraps into the right-hand side of the hole, bring the yarn to the back of the work and work the end in. This makes for a fairly sturdy opening and you can't argue with no snipping required!
I hope you enjoyed this tutorial I would love to see how it turns out for you when you give it a try! Leave me a comment here, post a photo on Instagram and tag me @meghanjoneslnmp or you can find me on Facebook too!
Want to knit a Lotusland Cardigan? This textured lace and twisted ribbing cardi is available in sizes 36 1/2 -62" bust circumference and the pattern stitches are charted and written out.


Magali
Thank you so much for this!I tried it on my cardigan that I just steeked and it worked great
Sarah Hirz
Thank you for these terrific instructions. Your search terms are spot on. Your pictures are so clear.
I haven’t knitted for years, so I’ll be back for help and inspiration.Sarah
Salomé
Thank you !
This was exactly the solution i was looking for ! And thus my gift-project is complete, all well and early for christmas.
I used your technique to perfect a mohair cardigan a machine-knitter fried of mine gave me as “failed”, i had finished the sleeves and hem, i found it perfect except it needed that little button hole so it could stay nicely closed. Thaks once again
Helen Rodriguez
I sometimes make after thought button holes just by fircing the button through. This technique of stitching around to secure that hole makes it look much neater. Thank you
Zuzika
Thank you. Thank you for this knitting hack! I really liked the results and may just use this method for a cleaner, stronger buttonhole. It was logical.
Zuzika