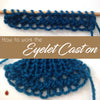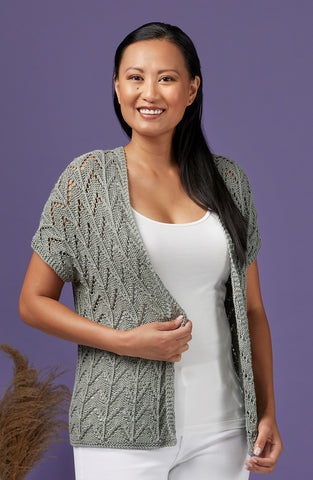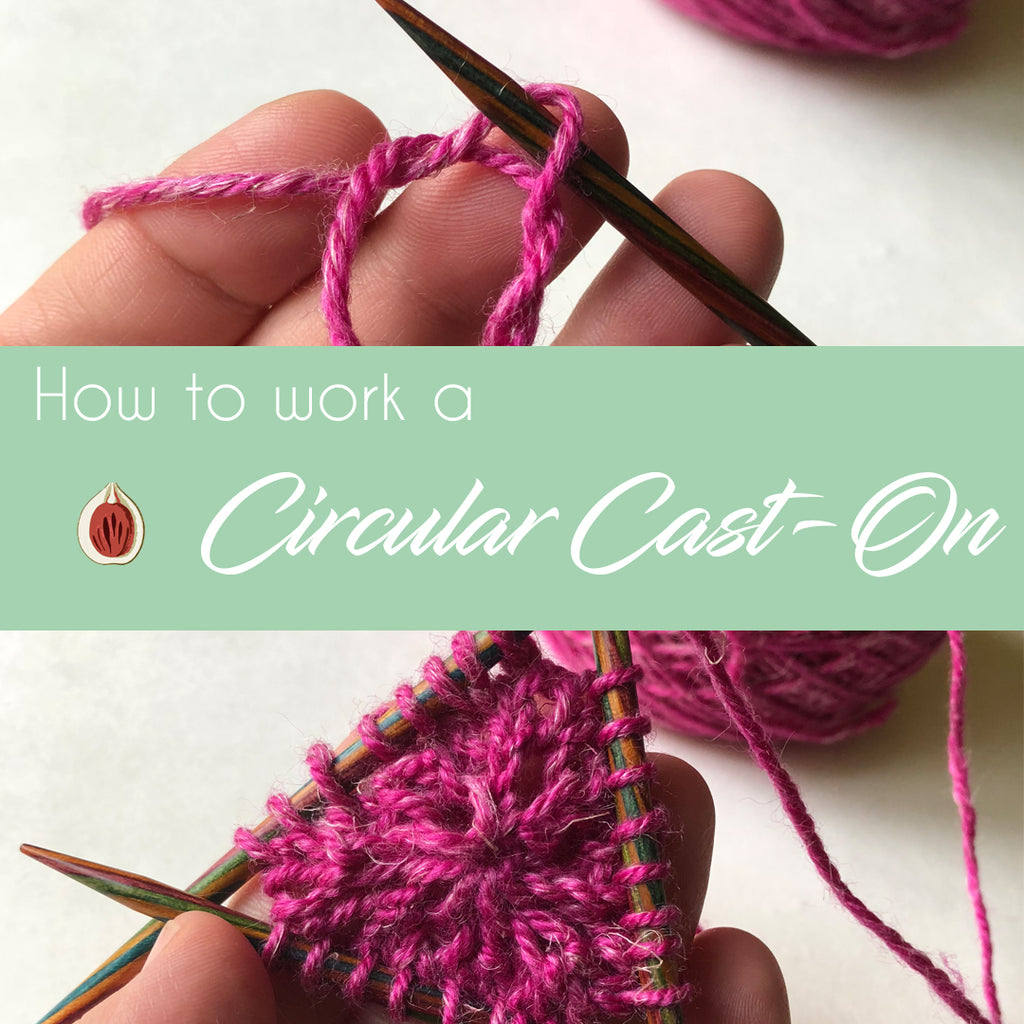

A circular cast-on is a very useful method for beginning a center-out shawl, top-down hat or toe-up sock. Stitches are cast on around a loop of the active yarn that is later tightened up to create a beautiful rosebud center. When finished, this cast-on looks exactly like a cut and sewn-through bind-off -- cutting the active yarn, threading it through the remaining stitches and pulling tight.
How to Work It

Begin by looping the active yarn to the left, down and around. The tail should be to the right and the yarn crosses with the active end over top of the tail to the left.

Using the first of four double-point needles, reach inside the loop and over the active yarn. Pinch the yarn loop with your left index finger and thumb; this part can be fiddly, and if the loop comes undone, just try again. (It is best to practice this cast-on with a sticky yarn like wool or this wool/linen blend I am using.)

Bring the needle over the active yarn and scoop down, pulling it back out of the hole to create the first stitch.

As you can see, there is one stitch on the needle with the tail of the yarn still hanging off to the right-hand side and the active yarn to the left.

Now bring the needle behind the active yarn and scoop from back to front creating a second stitch. Both of these stitches will have the right leg of the stitch in front; if your stitches have the left leg in front you are scooping in the wrong direction.

Continue to alternate between scooping the yarn from inside the loop and outside the loop for the remainder of the cast-on.

For this example there are eight stitches created; the last stitch is simply a loop of yarn over the needle and will easily fall off if moved onto several needles for working in the round. To remedy this issue the first round will be worked by sliding the stitches to work across on the right side and bringing the yarn behind the work from left to right.

Insert the needle into the first stitch and bring the active yarn around the back of the work. Knit across all stitches (if this seems familiar it's because this is the same technique that is used to create I-cord).

Now transfer the stitches to three double-point needles as evenly as possible Begin to work your pattern as indicated for a few rounds to establish some substance to the piece.

As you can see, there still remains a large hole from the circular cast-on. Leaving this open for the first few rounds makes for flexibility when using the double-point needles.

Turn the work with the wrong side facing.

Pull on the yarn tail to cinch the hole closed. Voila! A perfectly closed circular cast-on.
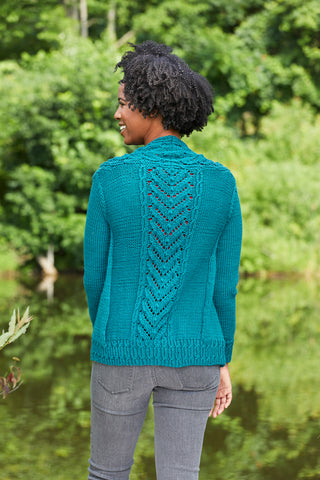
Want to try this out on a new pattern? Try the Norma Blanket, its worked from the center out in the round and it's free! I designed this pattern for Knitty in 2012 and it has been super popular ever since.