
How to: Knit and Twist Braids
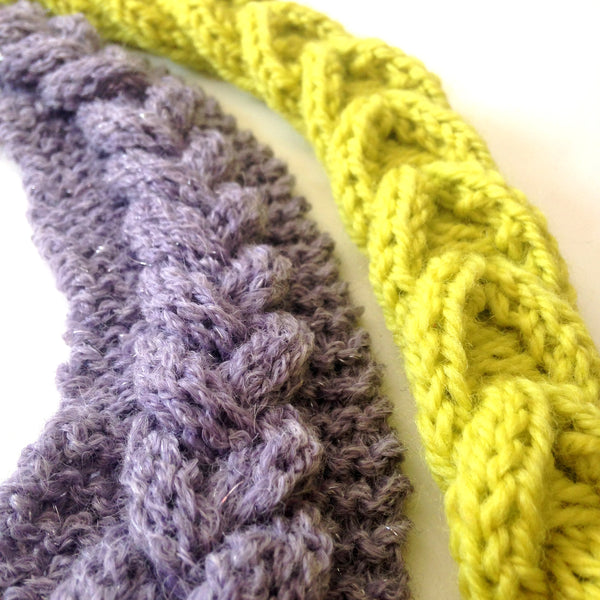
Braids are a unique way of manipulating your knitting into a 3-D sculpture. They are relatively simple to execute and require just a small amount of planning before beginning. Braids are great for those who like the look of a cable, but don't want to mess around with actually cabling, or for someone who desires a unique "how did you do that?!" kind of project. Most regular braids are worked with at least three strips that are moved over the center strip from the outside in. These knitted braids are worked with a clever combination of twists and folds that are physically different but visually similar.
Eyelet Braid
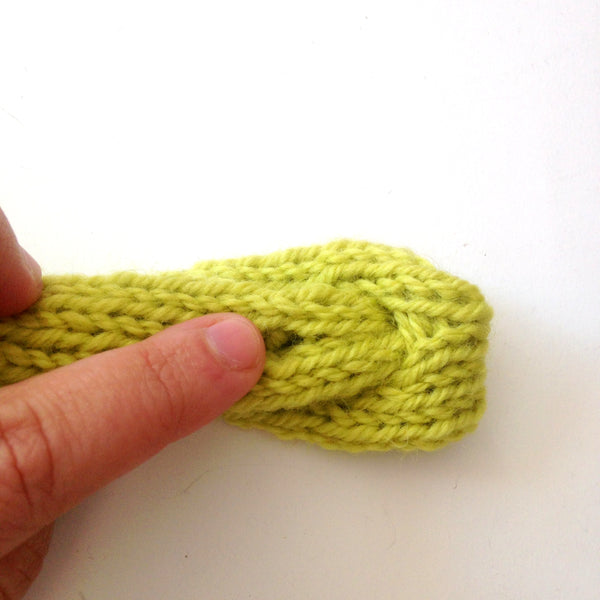
The pattern for this braid is essentially a long strip of knitting with eyelets worked up the center at even intervals. The strip of knitting is then folded in half and each end is brought up through the eyelets on the other side, repeating until the length is "braided." The closer the eyelets are (the fewer rows worked between them), the more pronounced the braid effect is.
To begin, cast on an even number of stitches and decide if you are going to work the edge stitches as something other than stockinette stitch. The sample shown has the first and last stitches worked as garter stitch. Since this braid absorbs length, you will need to work a length about 225 percent longer than the desired finished length.

Pattern used for sample.
18 stitches/22 rows per 4 inches over stockinette stitch using U.S. size 7(4.5mm) needles and worsted-weight yarn.
Cast on 10 stitches.
Row 1 (RS): Knit across.
Row 2 (WS): K1, purl to last stitch, k1.
Repeat las 2 rows 5 more times.
Eyelet row (RS): K5, yo, k2tog, k3.
Work WS row as established.
Rep last 14 rows for pattern.
To Braid
Find the center eyelet hole in the length of knitting.

Bring one of the ends of the knitting up through this hole and pull until the next eyelet is out and visible. This will create a twist in the work that should be moved to the back.
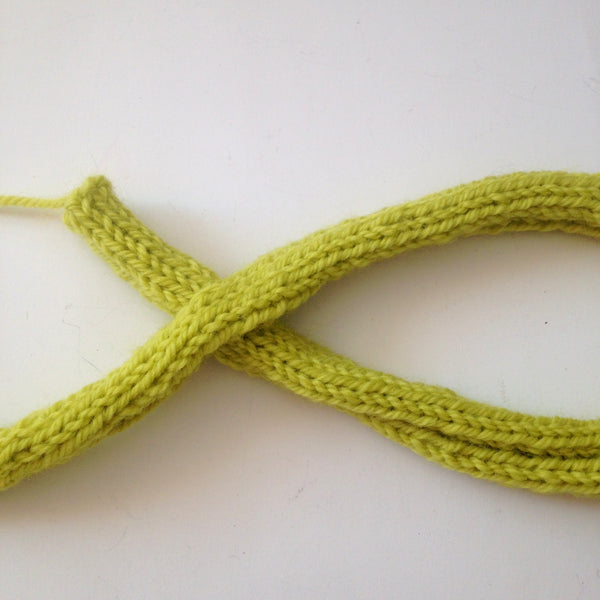
Now locate the next eyelet hole on the top length of knitting.
Bring the end of the bottom length of knitting up through that eyelet hole. This reverses which length of knitting is on the top and bottom.
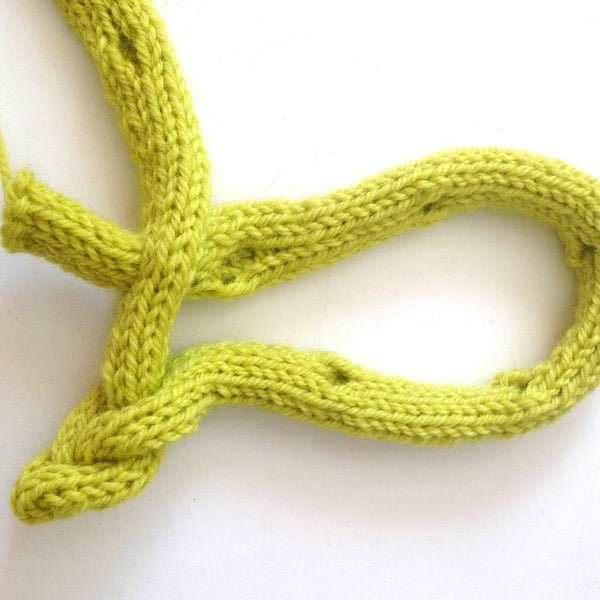
Now locate the next eyelet hole on the top of the knitting.
Bring the end of the bottom length through this hole.
Repeat until no eyelet holes remain.
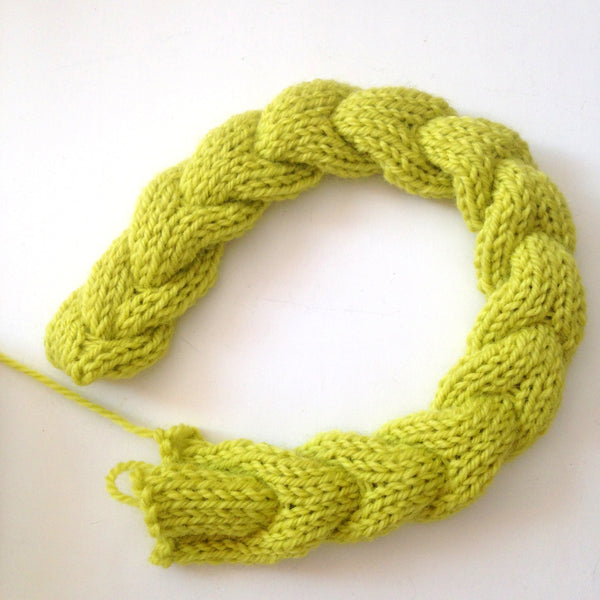
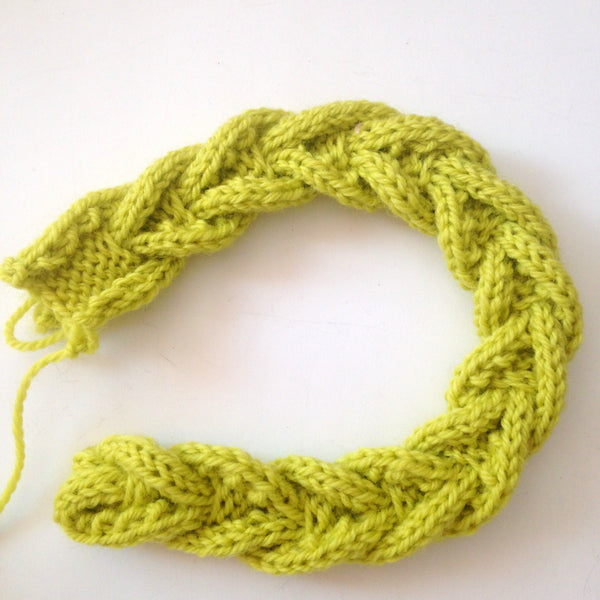
Design Tip: Try experimenting with fewer rows between the eyelets for a more twisted braid look, or try a much wider piece of knitting for an exaggerated edge. This technique can be worked with two lengths of yarn in different colors for a dual-color braid, or try working it with self-striping yarn to create a totally unique look.
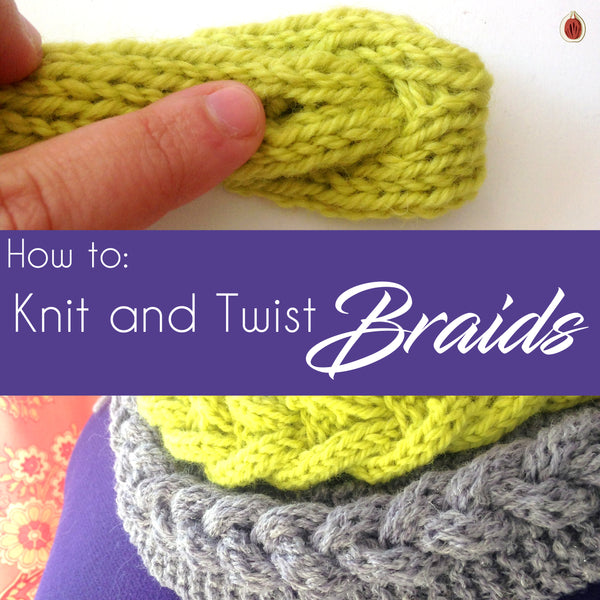
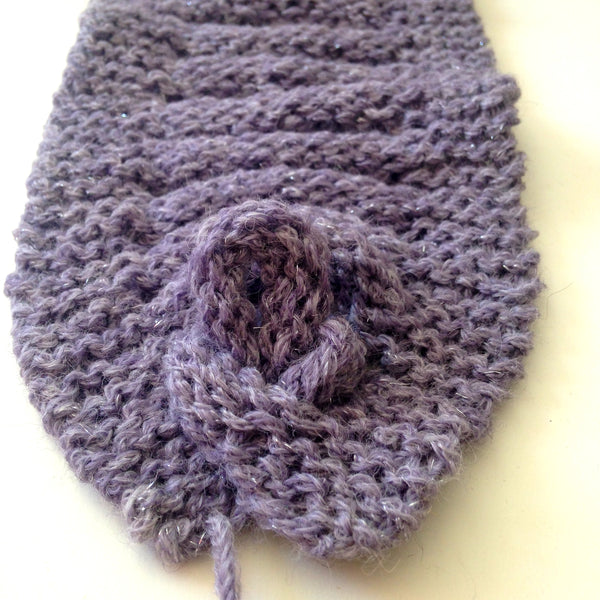
Bind Off & Twist Braid
This braid is still worked with only one length of fabric but has a series of stitches bound off and cast on for a "ladder" type look that is twisted up into a raised braid. The beginning and end stitches are worked in garter stitch for this sample, but could just as easily be worked with another type of stitch. The length of each bound-off section is twisted into a loop, and the following length is pulled through the opening. This means that the horizontal width of the bound-off section is almost completely absorbed into the braid, leaving the length of the strip relatively unaffected. When knitting the sample it proved effective to braid the ladder rungs up before measuring the length since the bound-off stitches droop and can skew length measurements.
PATTERN used for sample.
16 stitches/20 rows per 4 inches over stockinette stitch using U.S. size 9(5.5mm) needles and Aran-weight yarn.
Cast on 20 stitches.
Row 1 (RS): Knit across.
Row 2 (WS): K5, p10, k5.
Repeat Rows 1 and 2 once more.
Bind-off row (RS): K5, bind off 10, knit to end.
Cast-on row (WS): K5, cast on 10 using backward loop method, k5.
Repeat last 6 rows as many times as desired for pattern.
To finish, work Rows 1-4 once more.
Bind off all stitches.
To Braid
Flip work over so that the purl side of the "ladder rungs" are showing, since the bound-off stitches are worked in stockinette stitch, they will naturally curl and the purl side will be convex.
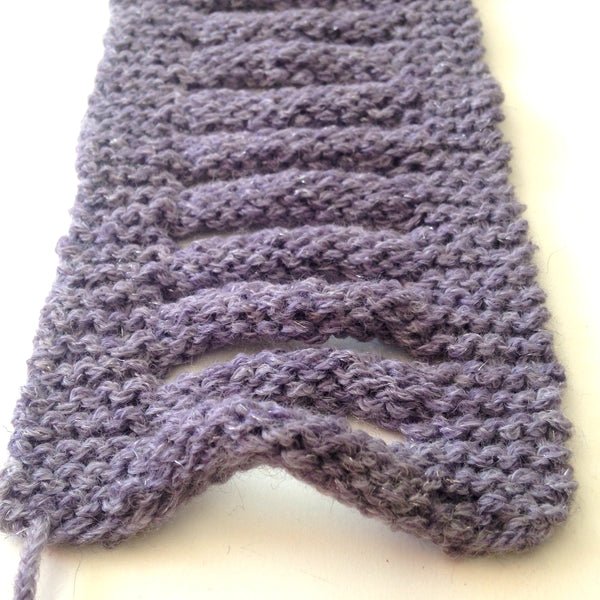
Bring up the bottom rung and twist into a loop, either to the right or left is fine; just be consistent and always twist the same way.
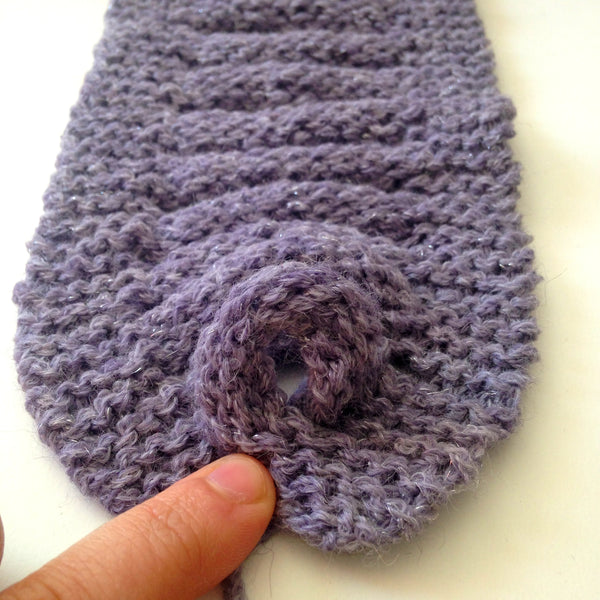
Bring the next "rung" up through the loop made by the first one and twist this one as well.
Continue up the strip, bringing the next rung through the twisted loop, continuing to twist into a loop.
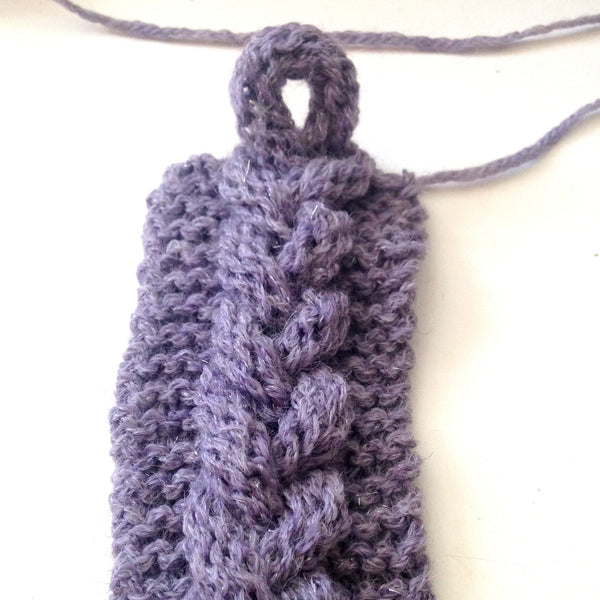
When all the rungs have been used, you will need to decide if the final rung will be secured permanently with stitching or temporarily with a shawl pin.
Design Tip: If the color is changed every six rows, this braid can also be a two-color braid. Try working this braid and securing the end with a piece of knitted I-cord tied in a bow; unfastening the cord means you can undo the braid. This braid would make a great travel case for small jewelry. Just undo the braid and secure bracelets and rings onto each loop while twisting.
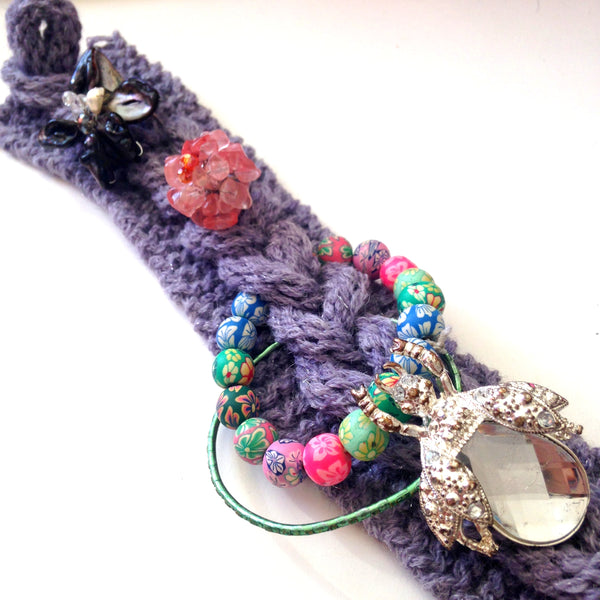
Where to Use Braids
There are many places you can use these braids in your knitted projects. What about bracelets or headbands? It could be used on the band of a hat, the neckline on a sweater or as a scarf. A long length worked with thinner yarn could be used as a necklace!

If you have any questions please feel free to ask them in the comments and I will get back to you, in the meantime, Happy Knitting! -Meghan


Helen Rodriguez
I wish you had this one on DVD. I am a visual learner and these braiding techniques look a little complicated for me