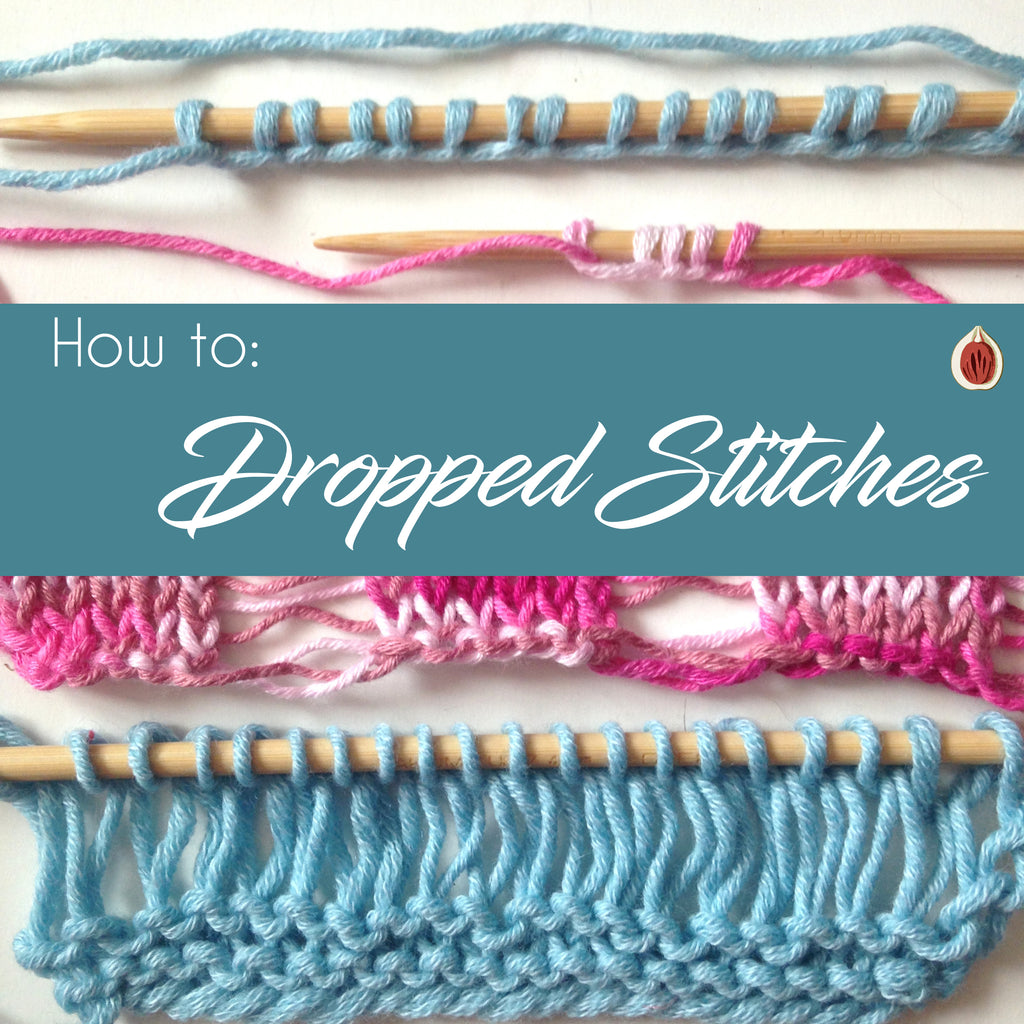

That Lacey Look: Dropping Stitches Intentionally
Dropped stitches are one of the easiest ways to purposefully add texture and lacelike patterning without actually working the paired increase and decrease of a lace pattern. There are two basic ways of intentionally working with dropped stitches. One way is to drop a stitch from the active knitting and allow it to unravel to the cast-on, creating a vertical ladder effect. The other way is to add extra wraps to your knit (or purl) stitches and then drop them from the needle on the next row, creating a horizontal line of extra-long stitches. What's interesting about these two techniques is that while many a beginner knitter has worked them by accident, creating a hole or run in the work, these can be used purposefully for a beautiful design feature.
Vertical Columns of Dropped Stitches
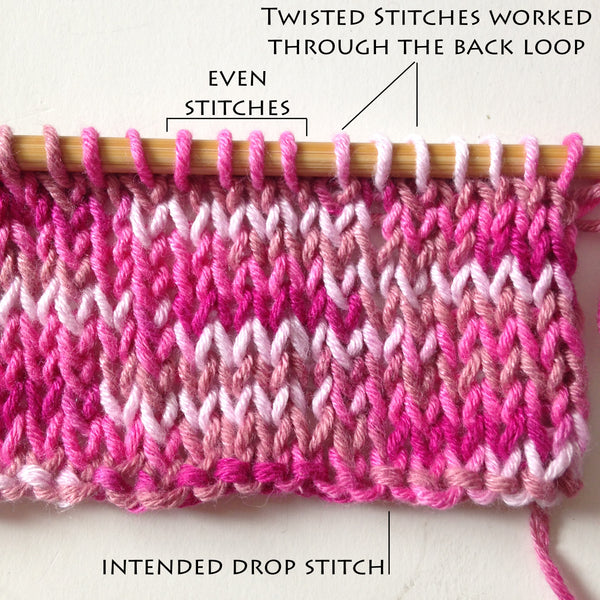
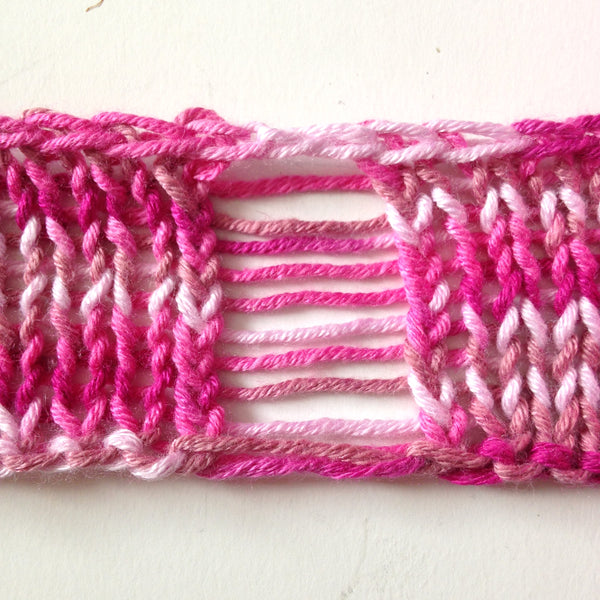
For this technique, you will need to have sections of stitches that include the stitch you intend to drop, a single stitch on either side of the intended drop stitch that will be worked through the back loop, and a set of stitches to be worked even. The sample shown has four stitches worked even, and a single intended drop stitch with one stitch on either side worked through the back loop. The stitches on either side of the intended drop stitch are worked with a knit 1 through the back loop to anchor the "ladder rungs" or horizontal bars made by the dropped stitches. Without these twisted stitches the extra width created with the dropped stitches can shift through the even-worked stitches, ruining the effect. The important thing to remember about this technique is that it will impact the overall width of an item, as the horizontal bars left from the dropped stitches are much wider than the knit stitches before they are dropped.
Sample Pattern
Cast on 16 sts.
Row 1 (RS): K4, [k1-tbl, k1, k1-tbl, k3] 3 times, k1.
Row 2 (WS): P4 [p1-tbl, p1, p1-tbl, p3] 3 times, p1.
Repeat Rows 1 and 2 for the length desired.
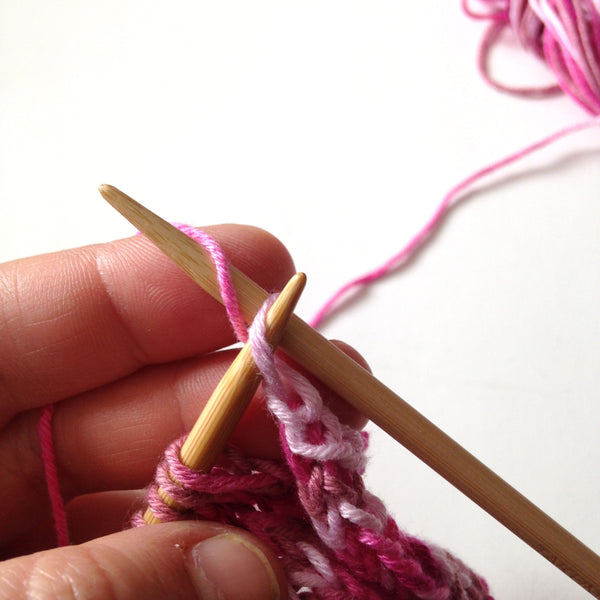
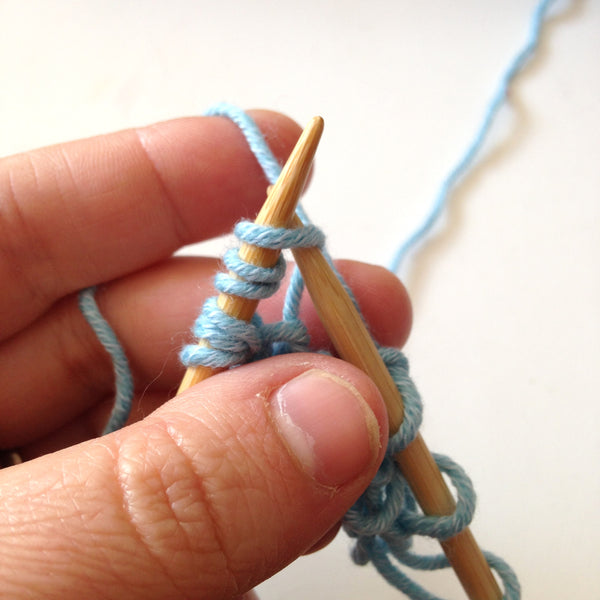
Now to drop the stitches, you will be binding off the work and dropping the stitches on the same row. Begin by binding off stitches until you are about to work into the intended drop stitch.
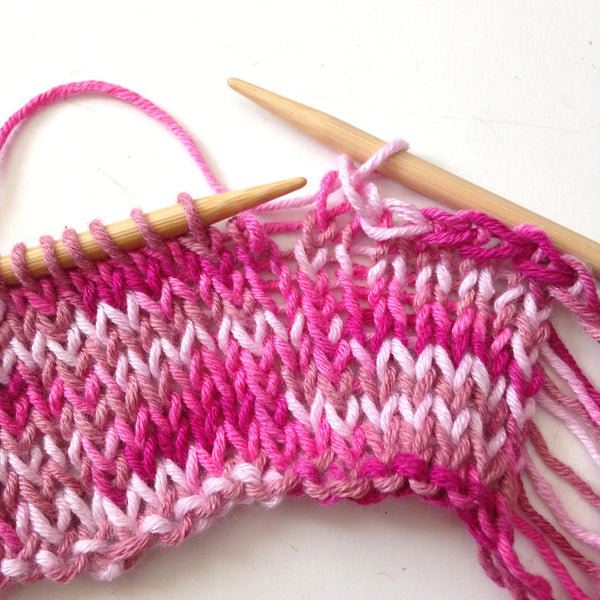
Now drop this stitch from the needle allowing it to unravel all the way to the cast-on.
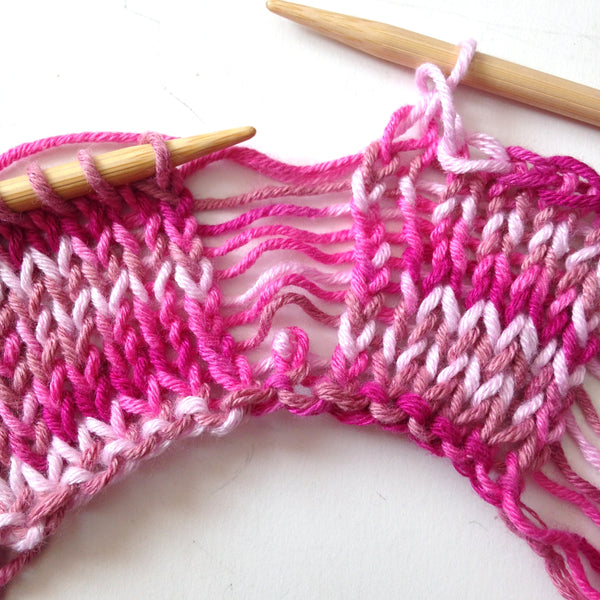
Chain Stitch Maneuver: Next lay the active yarn over the right needle, lift the stitch on the right needle over the active yarn; repeat this step once more. This will create what we would call a chain stitch if it was crochet. In this instance it is making extra length for your bind-off to flow over the space made by the dropped stitch.
Continue binding off stitches until the next intended drop stitch and repeat the chain stitch maneuver.
Tip: If you are planning to drop more than one stitch, work the chain stitch maneuver approximately twice for every stitch dropped.
Horizontal Rows of Dropped Stitches
For this technique you can work with as many or as few stitches as you want, with any patterning you like in the intervening rows between the dropped stitches. The thing to remember about this technique is that it will impact the length of the finished piece as the double- or triple-wrapped stitches are much longer than single-wrapped stitches. The sample pattern below is based on garter stitch where every row is a knit row and the triple-wrapped stitches are worked as knit stitches. However, this technique will also work with purl stitches and as many wraps in the stitch as you desire.
Sample Pattern
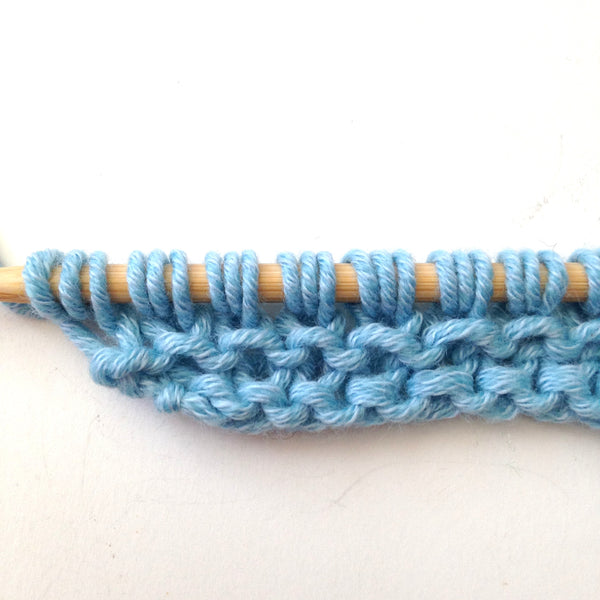
Cast on 16 sts.
Row 1 (RS): Knit across.
Row 2 (WS): Knit across.
Now insert the needle into the first stitch and wrap the yarn around the needle three times.
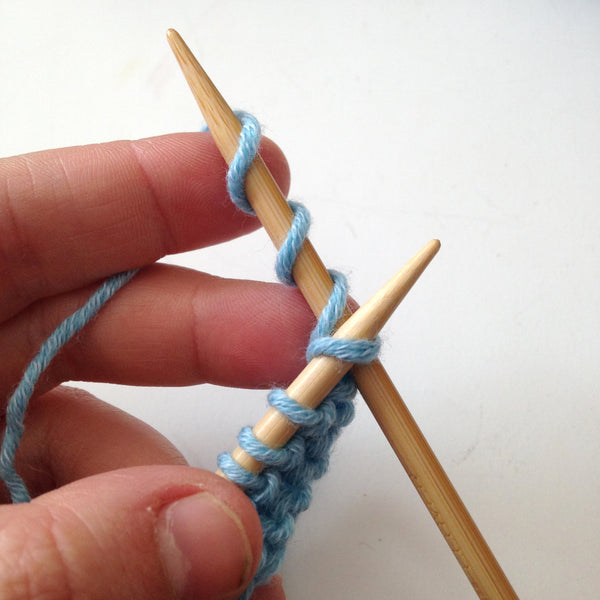
Bring all three wraps out of the stitch like you would for a normal knit stitch.
Repeat for the remaining stitches across the row. When the row is finished it will look like a collection of triple wraps all the way across the needle.
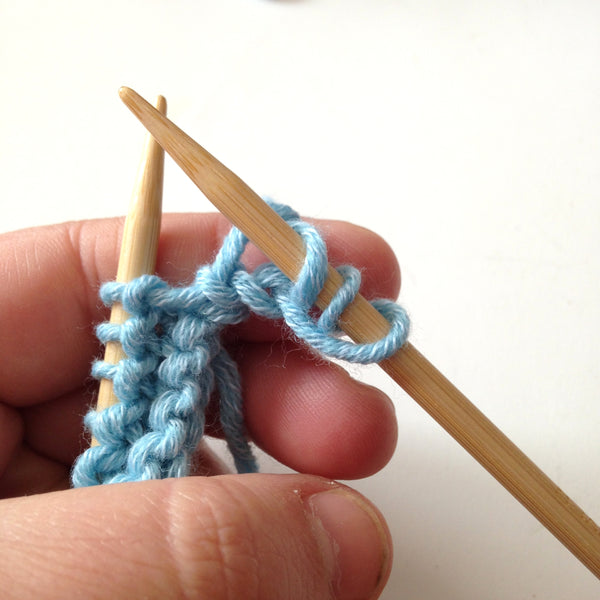
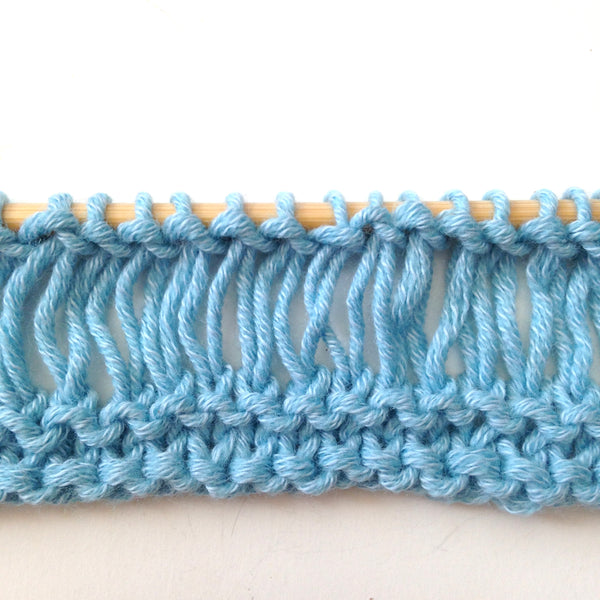
To work the dropped stitches: Insert the right tip into the front loop of the first stitch.
Wrap the yarn once and bring out, dropping the extra wraps; this will look like one big loop.

Continue for the remaining triple-wrapped stitches.
Tip: There are many dropped-stitch patterns that are a set pattern of increasing and decreasing numbers of wraps. This can create a scalloped shape within the work, and it looks great in variegated yarn too! Try experimenting with the number of wraps, the number of stitches used for each number of wraps, and the type of yarn used.


Yvonne
This was a big help. I had a drop stitch scarf with BO 4, drop 2 stitches, and repeat all the way across. I couldn’t figure out how to bridge the 1" gap for the next BO 4. Your chain stitch was a big help.